Friday, July 5, 2019

Fireworks & Freedom!

Monthly GIA Elementary Newsletter

Holiday Harrahs: 

How did you celebrate the 4th of July? If you live outside of America, what are your thoughts on this holiday? Share your pictures with us at giak6submit@gmail.com to see yourself featured in the next blog!  


Happy Birthday in July to...
  • Samuel Q.
  • Samuel A.
  • Ariel B.
  • Hanna T.
  • Rebecca M.
  • Violet S.
  • Isabelle S.
  • Diego H.
  • Alden K.
  • Jentzen R.
  • Kimberly A.
  • Aaron A.


 Storytime Announcements

We are suspending storytime for the summer. Join us back after August!


Chef's Corner!

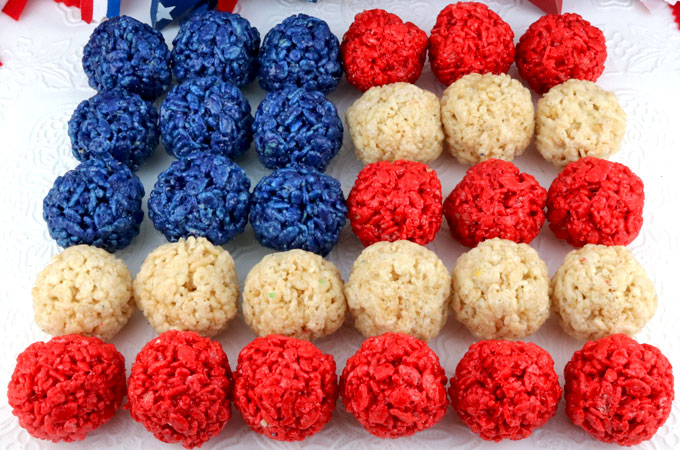
Patriotic Pretzels - yummy bites of sweet and salty Red White and Blue Fourth of July goodness that are super easy to make. They are perfect as a extra treat at a 4th of July party. Pin this colorful 4th of July dessert for later and follow us for more fun 4th of July Food Ideas. #4thofJuly #fourthofjuly #4thofJulyTreats #4thofJulyDesserts #4thofJulyFoodIdeas


Ingredients:

Festive Rice Krispies

  • Kellogg's Rice Krispies Cereal
  • Butter (we used salted, sweet cream butter)
  • Mini Marshmallows
  • Red food coloring
  • Blue food coloring
Instructions:
  1.  You will need to make three batches of Rice Krispie Treat mixture - one for each of the three colors Red White and Blue.
  2. Melt 3 tbsp of butter in a medium pan
  3. Add 3 cups of mini marshmallows and stir until the marshmallows are completely melted.
  4. Take the pan off the heat.
  5. Add food coloring and mix.
  6. Add 3 cups of Rice Krispie Cereal and mix until they are completely covered with the marshmallow mixture.
  7. Allow the Rice Krispie Mixture to cool slightly.
  8. Measure .5 oz of mixture and roll into a ball.
  9. Allow Rice Krispie bites to cool.
  10. Repeat for another Rice Krispie color. 
 Creating in the kitchen is so much fun! You can share your pictures of your Rice Krispie Bites on Griggs facebook page, or email them to me so that I can see your creation.


A Little Pick-Me-Up: Freedom


John 8:36 "So if the Son sets you free, you will be free indeed." 
The Fourth of July is a great time to celebrate the sacrifices our founding fathers, and many others, made in order to secure our country's freedom. They fought through difficult circumstances, some even giving up their life, so we could enjoy the freedom we have now. Freedom is not something to take for granted, and there are some parts in the world who don't have the same luxury as us. But apart from our political freedom, we have even greater freedom in Christ. Because of Jesus' sacrifice, we are free from sin, shame, and burdens. We can live a life complete in Him, certain that our salvation is secured in the blood. Whatever He has declared, no one can deter. 

Fourth of July Fun Facts:

  1. The Declaration of Independence wasn't signed on July 4 (or July at all). Instead, they just met to create the first draft of the declaration.
  2. The original celebrations included bombs and canons, kind of like our fireworks!
  3. Eating salmon on the Fourth of July is a tradition in New England.
  4. Massachusetts was the first state to recognize the holiday. 
  5. There are around 15,000 independence day fireworks celebrations every year. 

Craft/Science Project:

Red White and Blue Science Project - this is such a fun, easy science experiment for toddler, preschool, kindergarten, first grade, and 2nd grade kids. This baking soda and vinegar experiment is not only an easy presidents kids activities, but also a fun 4th of July activity for independence day,  #scienceexperiments  #4thofjuly #presidentsday


Check out this awesome science experiment!

Supplies:
  1. Cardstock paper
  2. Dish Soap
  3. Baking Soda
  4. Vinegar
  5. Red and blue food coloring
  6. Large jar
  7. Duct tape
  8. Scissors
  9. Large Tray
 Directions:
  1. Cut a piece of card stock paper big enough to fit across the center of your jar, and as tall as the jar. 
  2. Cut another piece of card stock paper the same height but only half as wide, so you can divide the jar into three sections. 
  3. Tape the pieces together, and place the divider inside the jar. It doesn’t have to be precise to work. 
  4. Add a few tablespoons of baking soda to each section. 
  5. Squirt some dish soap onto each section of baking soda. This will help the reaction last longer and become fizzier. 
  6. Squeeze some red food coloring into one section and blue into another.
  7. Place the jar onto a large tray. Pour a small amount of vinegar into each section.
  8. Watch as the red, white, and blue colors rise to the top and start to swirl together. Keep adding baking soda until the reactions stop
To see more information and pictures, visit: http://mentalfloss.com/article/502369/10-things-you-didnt-know-about-fourth-july

Thursday, June 6, 2019

Shortcakes and Soap- June Edition

Monthly GIA Elementary Newsletter

Student Features: 

Have you had to do any projects recently? Here is a really cool project on our own students created for her social studies class! She was tasked to create an African mask and this is what she came up with! Want to share your project with us? Email pictures to Cindy Cancel and we would love to share them! 


Happy Birthday in June to...
  • Cayla C.
  • Alywn F.
  • Sofia P.
  • Nicholas B.
  • Natilee B.
  • Martin A.
  • Tracy A.
  • Brynna E.
  • Leila A.
  • Esther S.
  • Jaira K.
  • Matthew T.
  • Hiromi M.
  • Mason L.
  • Wendolyn J.


 Storytime Announcements

starting for the new year on January 10th!

Chef's Corner!

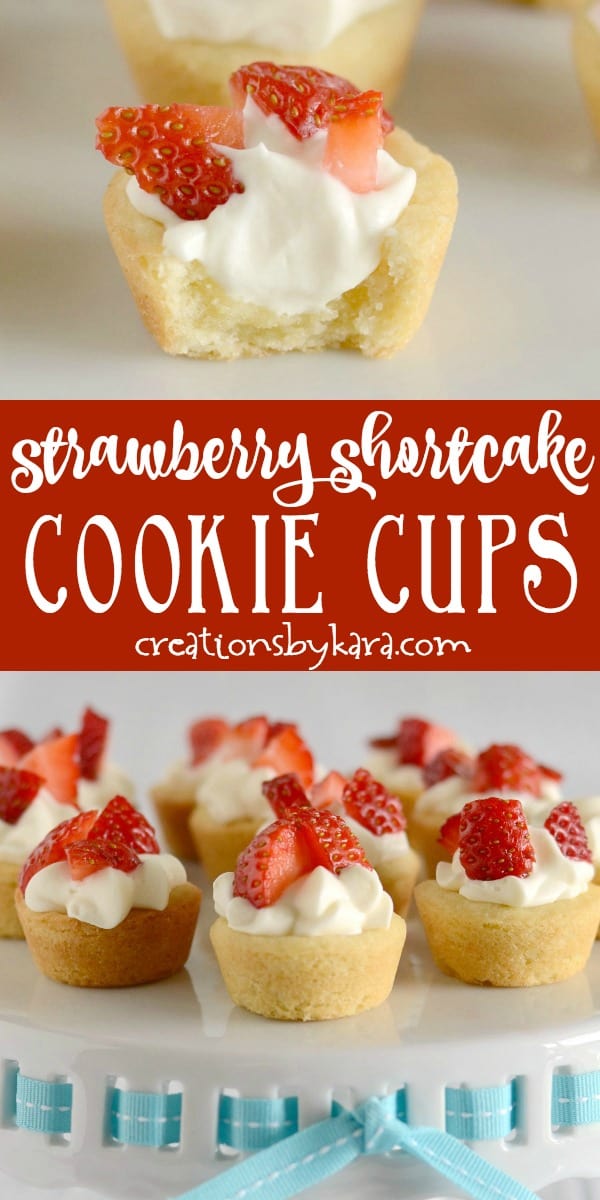
strawberry shortcake cups recipe collage


Ingredients:

Cookie Cups

§ 6 Tbsp butter, softened
§ 1/2 cup sugar
§ 1 egg
§ 1/4 tsp almond extract
§ 1/2 tsp vanilla
§ 1 1/4 cups flour
§ 1/2 tsp baking powder
§ 1/4 tsp salt

Filling

§ 1/2 cup whipping cream
§ 2 oz cream cheese, softened
§ 1/2 cup powdered sugar
§ 1/2 tsp vanilla

§ 1 cup strawberries, diced

Instructions:
  1.  Cream butter and sugar in a mixing bowl till creamy. Add egg, almond extract, and vanilla. Beat well
  2. Whisk together flour, baking powder, and salt. Add to creamed mixture and stir till well combined.
  3. Roll into 1″ balls and place in well greased mini muffin pans. Make an indentation in the dough with your thumb or the back of a teaspoon.
  4.  Bake at 350° for about 10 minutes, or till lightly browned on the edges. Use a spoon to press the dough down in the middle, forming a cup. Remove to cooling racks and cool completely.
  5. For filling: Beat whipping cream till stiff peaks form. Set aside.
  6.  Beat cream cheese till smooth. Beat in powdered sugar and vanilla. Add whipped cream, and beat till well combined.
  7. Fill cups with filling. I piped it in, but you can just spoon it in if you prefer.
  8. Top with diced strawberries. Serve immediately or chill.
 Creating in the kitchen is so much fun! You can share your pictures of your oreo brownies on Griggs facebook page, or email them to me so that I can see your creation.


"You Don't Say": Fine Motor Skills


 According to this article in the NY Times, the hobbies that adults used to do as kids (handwriting, coloring, sewing, woodworking, etc.) has had an important impact on the development of fine motor skills. Because they used their hands to do projects and crafts, they developed fine motor skills that many children are not developing. Children today are spending less time doing projects and more time working on screens. Recently,  medical schools have found a decline in the quality of fine motor control in their surgical residents. So parents, take a lesson from research and keep your kids hands and minds busy with lots of projects like cutting and pasting, knitting, whittling, and yes, cursive handwriting!

Craft/Science Project:

The amazing expanding ivory soap science experiment


Check out this awesome science experiment!

Supplies:
  1. Bar of Ivory Soap
  2. Microwavable Dinner Plate
  3. Microwave
 Directions:
  1. Before you begin, you can take a few minutes to let the children examine the bar of soap. Use descriptive words as you take turns holding it, feeling it and smelling it.
  2. Did you know that Ivory soap floats? It has a high air content! If you have an extra bar of ivory soap, you could drop the spare bar into a bowl of water to show the children how buoyant it is. 
  3. Place your Ivory on a microwaveable plate
  4. Put your soap in the microwave.
  5. Run the microwave on high for 1-2 minutes. Today I set my microwave for 1:30. You can't really overcook your Ivory, but it will reach a point where it stops expanding. 
  6. When the microwave stops, remove the soap and examine it.
  7. Caution! The plate and soap will be quite hot for a minute or so after being removed from the microwave. They cool down quickly but give the soap a few minutes before letting your children handle it. 
  8. Let your children investigate how the soap has changed: what started out as a hard bar of soap is now a fluffy, crumbly powder. 
  9. Visit this website for more scientific specifics: https://www.stevespanglerscience.com/lab/experiments/soap-souffle/
  10. Once you're done you can recycle it! We grab a roll of toilet paper and some water and the hooligans whip up a clean mud. It's a moldable dough that smells wonderful and keeps the kids entertained for hours. 
Visit this site to see all the instructions and more pictures: https://happyhooligans.ca/ivory-soap-microwave-experiment/

Monday, May 13, 2019

May Memoirs

Monthly GIA Elementary Newsletter

Student Features: 

Did you guys tune into the story time where Mrs. Cancel made some slime?! These students did and loved it! If you have any projects or crafts you want to share we want to see them! Share your photos with us at giak6submit@gmail.com to see them featured on next month's issue!


May Birthdays:
  • Amelia L.
  • Uchechukwu E.
  • Ryan G.
  • Amelia M.
  • Hadassah A.
  • Julia C.
  • Jason C.
  • Ammy A.
  • Christopher M.
  • Jesse Tm
  • Iythiy C.
  • Jordan S.
  • Emily D.
  • Bryan R.
  • Jaida M.
  • Gianna T.
  • Huldah E.
  • Jla S.
  • Tinomudaishe M.


 Storytime Announcements

starting for the new year on January 10th!

Chef's Corner!

Strawberry Lemonade Recipe | Homemade Lemonade | Strawberry Drink Recipe #lemonade #strawberries #drink #dinneratthezoo

Take advantage of the fruit this season and try out this awesome fruit drink recipe!

Ingredients:
  1. 2 cups of fresh strawberries
  2. 7 cups of water divided use
  3. 1 cup of sugar (or more to taste)
  4. 2 cups of fresh squeezed lemon juice
  5. Sliced strawberries, lemons and mint sprigs for garnish (optional)
Instructions:
  1. Combine the sugar with 2 cups of water. Microwave for 2 minutes or heat on the stove until very hot. Stir until sugar is dissolved.
  2. Place the strawberries in a blender with 1 cup of the water. Blend until smooth. 
  3. Combine the strawberry puree, sugar water mixture, lemon juice and remaining 4 cups of water in a pitcher.
  4. Stir thoroughly then chill until ready to serve. Just before serving, stir in sliced strawberries, lemon, and mint sprigs if desired.
For more information visit: https://www.dinneratthezoo.com/strawberry-lemonade/

 Creating in the kitchen is so much fun! You can share your pictures of your oreo brownies on Griggs facebook page, or email them to me so that I can see your creation.


A Little Pick-Me-Up: Chirps of reminder.


 "Indeed, the very hairs of your head are all numbered. Don't be afraid; you are worth more than many sparrows."

Now that the birds are singing again, I am constantly reminded of God's love for me. Did you know that birds during the winter have to search for enough food during the day to keep them warm at night? Where GRIGGS is located in Berrien Springs, MI the winter had a few days were it was below 0 degrees. One day even got down to -35 degrees! We were warm in our houses, but what about the birds outside? Not even the coldest winter could keep us from hearing them in the spring. God provided for their needs, and they are just birds! How much more does God care about us? He reminds us that even every hair on our head is counted. That is a lot of hair (although there may be a little less on your dad)! Never forget, no matter how bad it gets, or how alone you feel, that Jesus sees you, your needs, and will provide for your every need. You are worth more than the birds. 

Munching Caterpillars
With the warmer weather comes new life of not only plants but bugs and other things! Check out this classic story of the "Hungry, Hungry Caterpillar."


Craft/Science Project:

Cherry Blossom Paintings

Cherry blossom painting with cotton balls is the perfect spring art project for kids.

Bring in the spring season with these beautiful paintings you can display anywhere!

Supplies:
  1. Canvas paper
  2. Acrylic paint (regular paint can work also)
  3. Paintbrushes
  4. Paint palette (something to put your paint on)
  5. Water container
  6. Cotton balls
  7. Clothespins
 Directions:
  1. If you want to make the canvas bigger, you can tear and tape several pieces of paper together to make a larger surface area!
  2. Paint the entire canvas with blue for the sky. Our paint was mixed with white so you can see some white streaks here and there in the sky which I think looks nice. Using a larger flat brush for the sky works well.
  3. Let the sky dry completely, or if you are wanting to move on quickly, you can use a hair dryer to help speed things up.
  4. Draw in a branch with a pencil. Depending on the age of the child, they may need some help to do this. My daughter wanted me to draw her the branch and then she painted it in. Paint the branch with black paint and let it dry.
  5. Now the fun part! Using two shades of pink, one light and one dark, have the kids paint in the cherry blossom flowers with their cotton ball paintbrushes. Start with the darker shade first, then add the lighter pink. There is no need to let each color dry in between, kids can paint with both colors at the same time.
Visit this site to see all the instructions and more pictures: www.projectswithkids.com/cherryblossom

Wednesday, April 24, 2019

The Best April Fools Joke

Monthly GIA Elementary Newsletter

Student Features: 

Some of our international students are fueling their body with Vitamin D and their head with knowledge! Spring is officially here, is it warm where you are? What did you do for your spring break? Share your photos with us at giak6submit@gmail.com to see them featured on next month's issue!


April Birthdays:
  • Xavier P.
  • Robert C.
  • Sienna M.
  • Alejandra B.
  • Briana F.
  • Matthew B.
  • Maygin V.
  • Calan W.
  • Angelina U.
  • Hayden C.
  • Niki P.
  • Janelle S.
  • Bryce A.
  • Anke M.
  • Giuliano L.
  • Caden G.
  • Seojin H.


 Storytime Announcements

starting for the new year on January 10th!

Chef's Corner!

Bunny Nests
You can do this recipe with the coconut nests, or with Rice Krispies treats (these are easily made vegan)!
Coconut Macaroon Nests a classic dessert recipe for celebrating spring and Easter | Inspired by Charm

Ingredients:

  1. 4 egg whites
  2. 1 tablespoon sugar
  3. 1/2 teaspoon salt
  4. 1 package (14 ounces) sweetened flaked coconut
  5. 1/2 cup white chocolate chips (semi-sweet chocolate) melted
  6. 70-90 mini candy eggs
Instructions:
  1. Preheat oven to 300F. Coat the cups in a mini muffin pan with cooking spray and set aside.
  2. In a large bowl, lightly whisk together the egg whites, salt, and sugar to combine. Then, with a fork, mix in the coconut.
  3. Drop two tablespoons of the coconut mixture into each prepared mini muffin cup.
  4. Lightly press the mixture into the bottom and up the sides of each cup (use your thumb). Bake for 28-30 min, until lightly golden on top. (Loosely place a piece of aluminum foil over the top of the pan if the coconut starts to brown too quickly.)
  5. Let the nests cool in the tins on a wire rack for about 10 minutes. Then run a spatula around the edges of the muffin cups to loosen the nests. Carefully life out the nests and allow them to cool completely.
  6. With the melted chocolate in a piping bag (or a plastic baggie with the corner cut off), pipe a smalla mount of chocolate into each nest. Add 2 or 3 candy eggs and press them gently to secure.
  7. Enjoy now or save and pack for later!
 Creating in the kitchen is so much fun! You can share your pictures of your oreo brownies on griggs facebook page, or email them to me so that I can see your creation.


A Little Pick-Me-Up: Hope in Darkness


 It was now about noon, and darkness came over the whole land until three in the afternoon, the centurion, seeing what had happened, praised God and said, “Surely this was a righteous man.”

For the sun stopped shining. And the curtain of the temple was torn in two.
Jesus called out with a loud voice, “Father, into your hands I commit my spirit.” When he had said this, he breathed his last. 


The day Jesus died was a dark day. The Savior of the Jews, the world, was beaten, whipped and left to die, bleeding out on a cross. Every breath was an agonizing one as his disciples and those who followed him watched in horror as he slowly began to wither away. He took his last breath and they pierced his side to ensure he was dead. Then they took his body, prepared it and set it in a tomb. Can you imagine the sadness of those that day? A man who they had come to love was put to death for something he didn't do. He was innocent. It seemed like the darkness of that day would swallow them whole. But we know the story. Jesus would rise on the third day! Imagine you were him, and you woke up in complete darkness. The last thing you remember was your arms pierced through, struggling to breathe. You look at your wounds, and the scars alone remain. You appreciate the love and care your disciples took when they wrapped you, and so you say thank you to God for them. The next thing you do is get out of that darkness, it no longer has a hold on you. This is what Jesus offers. Freedom from our darkness, our sins, our past, the weight of death. Jesus pulled off the greatest April Fool's Joke of all-time! This Easter, contemplate on this and let's praise Jesus for all he has done. 

Abnormally Hilarious April Fools Jokes

  • Bring a box full of "Krispy Kreme" Veggies to work
  • Bubble Wrap under a rug and you'll for sure frighten your pet!
  • Frozen breakfast: parents, fill your children's bowl with their favorite cereal, milk and a spoon. Put it into the freezer overnight and see their reaction!
  • Add a "please honk" to your friend/spouse's car which will make for an interesting day at work
  • Make some "brownies" for dessert and cut out a brown E on construction paper and serve it after dinner! (Maybe you could follow up with some actual brownies later)

Craft/Science Project:

Easter STEM Project
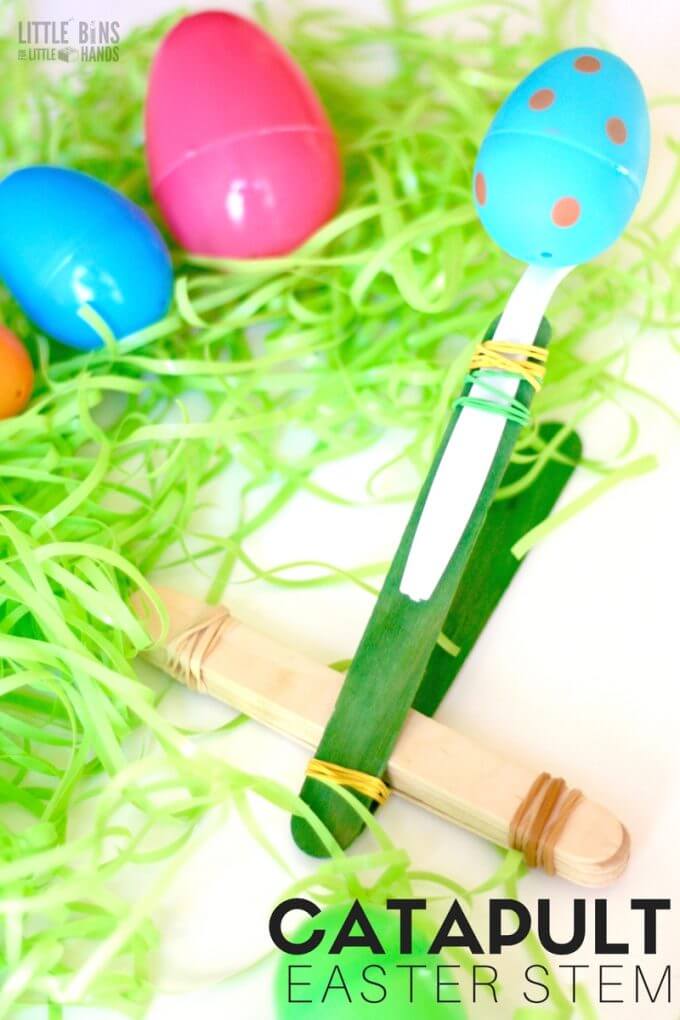
How to make a catapult for Easter! Try our simple to make Easter catapult STEM activity and launch plastic eggs. Explore simple machines and physics with rubber bands and popsicle sticks.

Study the laws of motion with this fun Easter activity!

Supplies:
  1. 10 Jumbo Popsicle Sticks
  2. Rubber Bands
  3. Spoon
  4. Plastic eggs (various sizes)
Instructions:
  1. Stack 8 jumbo popsicle sticks.
  2. Insert one jumbo popsicle stick into the stack resting on the top of the bottom last stick. Just a small portion of the stick should be through. This step can be done after the next if you wish.
  3. Tightly wind rubber bands around either end of your stack.
  4. Place the last jumbo stick on top of the stack in the same position as the stick that you have already inserted. 
  5. Very quick and simple. You can add a spoon in a couple different ways or none at all as seen below.
  6. This is a great way to experiment with design and how it affects the motion of the catapult. 
Visit this site to download the STEM printable and see more pictures: https://littlebinsforlittlehands.com/easter-catapult-stem-activity-kids/


    Friday, March 1, 2019

    Messes, Munches and March.

    Monthly GIA Elementary Newsletter

    Student Features: 


    Domenic tuned into story time and tried his hand at Mrs. Cancel's "Snow Project" From what we can tell, the project turned out spectacular! Did you do this project too? Send us some pictures and you may be featured in the next blog post!


    March Birthdays:
    • Henry F.
    • Thomas P.
    • Mychael P.
    • Sarai E.
    • Angelina M.
    • Emmanuel N.
    • Michael M
    • King C.
    • Dylan S.
    • Mary M.
    • Adelaide E.
    • Darla N.
    • Amira C.
    • Om D.
    • Lintlenthati T.
    • Phillip G.
    • Haylie B.
    • Joshua S
    • Juan C.
    • Ashely P.
    • Tandy A.


     Storytime Announcements

    starting for the new year on January 10th!

    Chef's Corner!

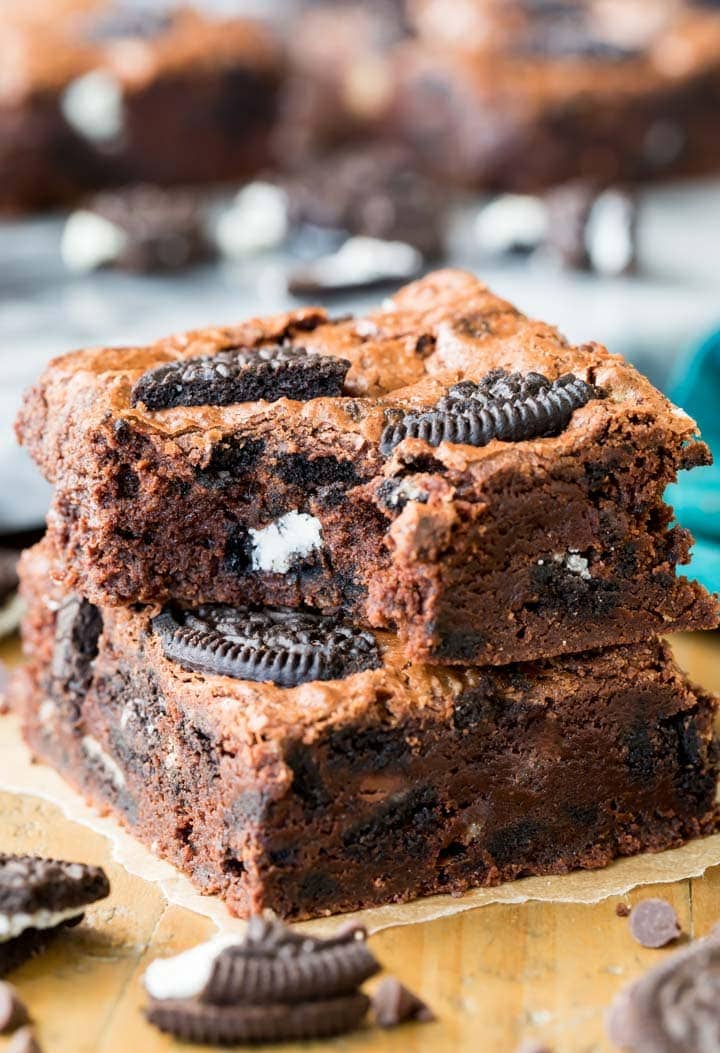
    Oreo Brownies (March 6)

    Fudgy Oreo Brownies
    Ingredients:

    1. 12 Tablespoons unsalted butter cut into Tbsp-sized pieces
    2. 1/2 cup semisweet chocolate chips
    3. 1/2 cup natural cocoa powder
    4. 3/4 cup sugar
    5. 3/4 cup brown sugar packed
    6. 2 large eggs + 1 egg yolk
    7. 1 teaspoon vanilla extract
    8. 1/2 teaspoon salt
    9. 1 cup all-purpose flour
    10. 1/3 cup mini chocolate chips
    11. 20 oreo cookies
    Instructions:
    1. Preheat oven to 350F and line a 9x9 baking pan with parchment paper
    2. Combine butter and 1/2 cup (100g) semisweet chocolate chips in a large, microwave-safe bowl.
    3. Microwave for 30 seconds. Stir well, microwave for another 15 seconds and then stir well again. Repeat for 15 seconds until chocolate and butter are completely melted and well-combined.
    4. Add cocoa powder and instant coffee (if using), stir well.
    5. Add sugars, stir until completely combined.
    6. Add eggs, one at a time. After each addition, stir well, and then stir another 30 seconds (the better you stir your batter, the cracklier your brownie tops will be).
    7. Stir in vanilla extract.
    8. Sprinkle salt over batter and add flour, stir very well, until completely combined.
    9. Place 15 of your Oreos in a large Ziploc bag and use a rolling pin or mallet to smack until broken into pieces (don't crush into fine crumbs, you want decent sized pieces to bite into!).
    10. Add broken cookie pieces and mini chocolate chips and stir into batter.
    11. Spread batter into a prepared 9x9 pan.
    12. Break remaining 5 Oreo cookies into pieces and press gently into the surface of the brownie batter.
    13. Bake on 350F (175C) for 30-35 minutes if using 9x9 pan (toothpick inserted in center should be just slightly fudgy, but not wet with batter).
    14. Allow cooling before cutting and serving.
    For more information visit: https://sugarspunrun.com/oreo-brownies/

     Creating in the kitchen is so much fun! You can share your pictures of your oreo brownies on griggs facebook page, or email them to me so that I can see your creation.


    A Little Pick-Me-Up: Little Tests


    Luke 16:10-"Whoever can be trusted with very little can also be trusted with much, and whoever is dishonest with very little will also be dishonest with much."

    You ever feel like God isn't answering your big prayers? Like that big job you want, or that big toy you prayed for? It can feel like God is holding something back from us. But before we get as bitter as a sour apple, we should take a look at our hearts. Are we being faithful with what God has already given us? Are you treating those around you, the gifts of family and friends, with love and care? Before you get the big things, God wants us to be faithful with the "little" things. 

    March Munchies: Check out these National Food days in the month of March
    March 1: National Peanut Butter Lovers Day 
    March 1: National Fruit Compote Day 
    March 2: National Banana Creme Pie Day (also spelled Cream Pie) 
    March 3: National Cold Cuts Day 
    March 4: National Pound Cake Day 
    March 4: National Snack Day 
    March 5: National Cheese Doodle Day 
    March 5: National Absinthe Day 
    March 6: National Frozen Food Day 
    March 6: National Oreo Day 
    March 6: National White Chocolate Cheesecake Day  
    March 7: National Cereal Day

    Read more at: http://www.thenibble.com/fun/more/facts/holidays-march.asp

    Craft/Science Project:

    Blubber Experiment: Want to know how a whale stays warm in the frigid waters of winter? Check out this experiment! 


    Supplies:
    1. 1 Big bowl
    2. Ice
    3. Water
    4. 2 Quart Ziploc bags
    5. 1 Gallon Ziploc bag
    6. Oil (vegetable or canola)
    Instructions:
    1. Fill the big bowl with ice water and some vegetable oil.
    2. Fill the two smaller Ziploc bags about halfway with oil and seal them.
    3. Put those two bags inside the big bag. The kids will be able to put their hands inside the big bag in between the two bags of oil, almost like a glove.
    4. Then put both hands, one in the bag with oil and the other by itself into the bowl.
    5. Which one is warmer?
    Visit this site to see more pictures of the experiment: http://tippytoecrafts.blogspot.com/2012/01/blubber-experiment.html

    Check out this youtube video about how blubber keeps whales warm!