Wednesday, February 6, 2019

Puppy chow, Snowmen and Fun Facts!

Monthly GIA Elementary Newsletter

Student Features: 


Here we have Jomar and Brianna making a "Fake Snowman" in sunny Florida! Did you do this storytime activity? Keep sending us pictures and you may be featured on the next blog post! 


February Birthdays:
  • Elora H.
  • Madison K.
  • Mara R.
  • Daveline N.
  • Reagan N.
  • Talise M.
  • Shania C.
  • Joshua S.
  • Yendrys P.
  • Emily L.
  • Ryan L.
  • Justin S.
  • Mallory D.
  • Princess R.D.
  • Michaela R-C.
  • Reo I.
  • Vance A.D.
  • Korbin C.
  • Junelly R.
  • Charity C-K.
  • Melissa M-N.
  • Sara G.
  • Jeremy B.


 Storytime Announcements

starting for the new year on January 10th!

Chef's Corner!

Puppy Chow
How to make classic puppy chow (muddy buddies).

Ingredients:

  1. 9 cups of Chex Cereal (12oz box)
  2. 1 cup of semi-sweet chocolate chips
  3. 1/2 cup of creamy peanut butter 
  4. 1/2 cup of butter (1 stick)
  5. 1 tsp of vanilla extract
  6. 1 1/2 cup of powdered sugar
  7. Parchment paper
  8. Gall sized ziploc bag

Instructions:

  1. In a small saucepan, melt the butter over medium heat. Add in the chocolate chips and peanut butter, stirring frequently until chips are melted and smooth.
  2. Remove saucepan from heat and stir in vanilla
  3. Add Chex cereal to a 13-quart mixing bowl. Pour chocolate-peanut butter mixture on top and gently stir with a spatula until all Chex cereal is coated. Set bowl aside.
  4. Set a baking sheet nearby and cover with parchment paper.
  5. Add powdered sugar to the gallon sized Ziploc bag. Working in batches (about 1-2 cups at a time), add coated Chex cereal to bag with powdered sugar, seal or twist the top of the bag closed and then shake the bag until the Chex cereal is coated with sugar. Remove finished puppy chow and spread out on the prepared baking sheet. Repeat until all the puppy chow is made. When finished, discard the plastic bag and any dry powdered sugar that remains inside.
  6. Let puppy chow cool completely before eating. Once cooled, transfer to a sealed container and store for up to 5 days. 
*You can add cool additions to this puppy chow to make it more like trail mix! Add candy, nuts or fruits to mix it up.
See full recipe here: https://homemadehooplah.com/puppy-chow-chex-mix/

 Creating in the kitchen is so much fun! You can share your pictures of your apple crisp on griggs facebook page, or email them to me so that I can see your creation.


A Little Pick-Me-Up: Bouncy Prayers


Psalm 28:6-7- "Blessed be the Lord because he has heard the voice of my supplications! The Lord is my strength and my shield; My heart trusted in Him, and I am helped; Therefore my heart greatly rejoices and with my song, I will praise Him." 

Praying to God can sometimes feel a little weird. I mean, technically we are talking out loud to some person we can't see, right? Sometimes it may feel like our prayers are hitting the ceiling. Some people may say that God is an imaginary friend, but David, and hopefully you too, knew better! This psalm is describing David's reaction to God's answered prayer in his life. We don't know exactly what prayer it was. Maybe he had finally been crowned king, or the herd of sheep he prayed for arrived on his front door. Whatever the case, he realized that we can put our trust in God because He never lets us down. Our prayers will always be answered, whether that is a yes, no or not yet. We challenge you to pray for three things this month, make them specific, and see how God answers your prayers!  


Fun Fact February: 
  1. Every four years there is a leap year in the month of February. 
  2. Superbowl, the largest sporting event of the year, is held in February. 
  3. In Old English, February was called Solmonath (mud month) or Kale-monath (kale month).
  4. February is amongst the most misspelled words. 
  5. February is "Black History Month."

Craft/Science Project:

The Unpoppable Bubble


Blow a bubble that is much harder to POP!

Supplies:
  1. 3 cups of water
  2. 1 cup dish soap
  3. 1/2 cup corn syrup
  4. Scissors
  5. Plastic Pipette
  6. Microfiber gloves
Instructions:
  1. Pour water into a bowl.
  2. Add dish soap into a bowl
  3. Add corn syrup
  4. Mix well.
  5. Cut off the end of the pipette.
  6. Dip cut end of the pipette into bubble solution and blow from the other end to make unpoppable bubbles! 
Visit this site to watch a video and learn more about bubbles: https://hiphomeschoolmoms.com/unpoppable-bubble-recipe/


    Friday, January 4, 2019

    New Year Chronicles

    Monthly GIA Elementary Newsletter

    Teacher Feature: Winter Break Wipe-Outs

    This winter break, one of our teachers trekked with her Oregonian family up to Mt. Hood. On the mountain, they went snow tubing down a fairly steep hill. This video is the first wipe out they experienced, however, it, unfortunately, wasn't them who wiped out. This video captured their experience. We hope your Christmas break was as fun, but safer than hers!


    January Birthdays:
    • Becky A.
    • Lelentle K.
    • Tiffany V.
    • Catherine C.
    • Micah C.
    • Jessica A.
    • Tsedintle
    • Jonathan S.
    • Evans Junior M.
    • Brock H.
    • Rita B.
    • Yuliya H.
    • John-Nathan S.
    • Hananiah A.
    • Charles D.
    • Kyle R.
    • Rebekah S.
    • Devan S.
    • Abrielle W.
    • Aivah G.
    • Xan E.


     Storytime Announcements

    starting for the new year on January 10th!

    Chef's Corner!

    Nothing is better on a cold than a nice big bowl of flavorful chili. Substitute the chicken for veggie meat and enjoy! 


    Ingredients:
    •1 onion, chopped
    •3 cloves garlic, minced
    •1 Tb oil
    •2 – 15 ounce cans vegetable broth
    •15 ounce can petite diced tomatoes
    •7 ounce can diced green chilis
    •2 rounded tsp chili powder
    •1 rounded tsp oregano
    •2 can black beans, drained and rinsed
    •1 can corn, drained
    •1  bag of Gardein Chicken Strips
    •Optional toppings: cheese, cilantro, avocado, sour cream and tortilla chips

    Instructions:
    1. In a large pot heated over high heat, add the oil, onion and garlic. Sauté until the onions soften. 
    2. Add the broth, tomatoes, chilis and seasonings. Bring to a boil and allow to simmer for 5 minutes. 
    3. Add the beans, corn and chicken then simmer for 5 minutes before serving with cheese, cilantro, avocado, sour cream and tortilla chips.


     Creating in the kitchen is so much fun! You can share your pictures of your apple crisp on griggs facebook page, or email them to me so that I can see your creation.


    A Little Pick-Me-Up


    Isaiah 43:19- "I am about to do something new. See, I have already begun! Do you not see it? I will make a pathway through the wilderness. I will create rivers in the dry wasteland."

    The new year can be full of exciting events and a time to refresh ourselves. New commitments are made and we try to better ourselves through spiritual growth and healthy choices. However, by the middle of February, we seem to find ourselves in the same cycle! This verse is a reminder that Jesus is the only one who can create real, lasting change in our hearts and lives. As we move forward into 2019, let's focus not on ourselves and our efforts, but on the One who makes all things new. 


    Happy New Year: 
    Parents, try this cool new years resolution with your kids! Here is the link if you want the printable: https://www.thirtyhandmadedays.com/new-years-resolution-kids-2018/
    Updated Year in Review - 2018 - have your kids fill this sheet out every year! from www.thirtyhandmadedays.com
    Image result for happy new year gif cartoon

    Craft/Science Project:

    Let's start school this year with a BANG!

    erupting snowballs winter science

    Supplies:

    • 1 cup baking soda
    • 1 tsp. dish soap (+ extra for experimenting)
    • glitter
    • water
    • Vinegar
    • Spray bottle
    • Glass Jar
    • Pie Tin
    To Make the Snowballs:
    1. Stir together baking soda and glitter in a bowl. Combine your baking soda mixture with dish soap and mix well.  Add water to your spray bottle and mist your baking soda mixture.  Mix it with your hands and continue misting until a dough forms.  Once a dough forms you can place it in a mold.  I used a large round Tbsp. measuring spoon to make mine but a small muffin tin or other forms would work just as well.  Let dry at least 12 hrs until completely dry.
    The Experiment
    1. Place your glass jar inside your pie tin.  The pie tin will catch the overflow.
    2. We experimented with six different volumes and solutions to see the reactions of our erupting snowballs.
      3 oz vinegar
      2 oz vinegar, 2 oz warm water
      6 oz vinegar
      3 oz vinegar, 3 oz warm water
      6 oz vinegar, 1/2 tsp dish soap
      3 oz vinegar, 3 oz warm water, 1/2 tsp dish soap
    3. Take notes and see which one gives you the biggest reaction! 

      Monday, December 10, 2018

      Jingle all the...

      Bi-Weekly GIA Newsletter

      Christmas Around the World

      The Giant Lantern Festival (Ligligan Parul Sampernandu) is held each year on the Saturday before Christmas Eve in the city of San Fernando – the “Christmas Capital of the Philippines.” The festival attracts spectators from all over the country and across the globe. Eleven barangays (villages) take part in the festival and competition is fierce as everyone pitches in trying to build the most elaborate lantern. Originally, the lanterns were simple creations around half a metre in diameter, made from ‘papel de hapon’ (Japanese origami paper) and lit by candle. Today, the lanterns are made from a variety of materials and have grown to around six metres in size. They are illuminated by electric bulbs that sparkle in a kaleidoscope of patterns.

      Looking for some festive sparkle? Spend Christmas in the Philippines

      December Birthdays:
      • Gabriel P
      • Mohammed R.
      • Zoe H.
      • Eugene K.
      • Alle B.
      • Caellum L.
      • Rahel A.
      • Tiffany M.
      • Joanne L.
      • Jamerra S.
      • Jahziyah A.
      • Clarisse F.
      • Tamupiwanashe T.


       Storytime Announcements

      Baker's Corner!

      Santa Hat Pancakes

      Cute and Easy Santa Hat Mini Pancake Stackers recipe - a fun and healthy Christmas breakfast idea for kids from Eats Amazing UK


      Mini Pancake Ingredients:
      • 140g self-raising flour
      • 1 tsp baking powder
      • 2 tbs golden granulated sugar
      • pinch salt
      • 125ml milk (or soya milk for dairy free)
      • 1 large egg
      • 2 tbs vegetable oil
      • butter or dairy-free spread for frying

        • To Serve:
          • 8 large strawberries
          • mini marshmallows
          • icing sugar for dusting (optional)
          • Whipped cream (optional)
        1. Start by making the mini pancakes. These taste best warm from the pan but can also be made in advance and stored in an airtight container in the fridge for a day if necessary.
        2. Measure out the flour, baking powder, and sugar and sift into a bowl along with the salt.
        3. In a separate jug or bowl, lightly whisk the egg then mix with the milk and oil.
        4. Mix the wet and dry ingredients together then lightly whisk until well combined and lump free.
        5. Spoon the pancake mix into a sauce bottle or piping bag then leave to rest for 5 minutes while you heat up the pan. If you don’t have a sauce bottle or piping bag, just leave the mixture to rest in the bowl and use a teaspoon to make the pancakes instead.
        6. Heat the pan over a medium heat, then drop in the butter and swirl around until completely melted.
        7. Draw and then fill in mini circles of pancake mixture to make your pancakes, making sure you leave enough room between the pancakes to flip them over once ready.
        8. Cook the pancakes until they start to bubble up, then flip them over and cook on the other side until golden.
        9. Remove from the pan and repeat until all the mixture is used up.
        10. To assemble the pancake stacks, start by making the Santa hats. Cut the top off each strawberry. Push each strawberry onto a cocktail stick leaving a small point sticking out of the pointy end, then pop a marshmallow on top to form the hat.
        11. Stack the pancakes, 4 or 5 to a pile, then top each stack with whipped cream and a Santa hat strawberry, pushing the cocktail stick into the stack to hold it all together. 
        12. Place on a platter or board, dust with icing sugar and serve immediately.

         Creating in the kitchen is so much fun! You can share your pictures of your apple crisp on Griggs facebook page, or email them to me so that I can see your creation.


        A Little Pick-Me-Up


        John 1:14 says, "The Word became flesh and made his dwelling among us. We have seen his glory, the glory of the one and only Son, who came from the Father, full of grace and truth." Even though Christmas wasn't when Jesus was actually born, we still celebrate his birth during this time. Jesus coming to this earth was the single greatest thing that has ever happened in history. Because of Him, we can have everlasting. He took on pain and limitation so we could be free! Let's focus on Jesus this season, thanking Him for His sacrifice. 


        Christmas Facts:
        • Want to know a useful way to recycle your Christmas tree? Some zoos take donated Christmas trees and use them as food for the animals. 
        • In 1914 during World War I there was a now famous Christmas truce in the trenches between the British and the Germans. They exchanged gifts across a neutral no man’s land, played football together, and decorated their shelters. (Read more about it in the book “Silent Night: The Story of the World War I Christmas Truce” by Stanley Weintraub.)
        • The Christmas wreath was originally hung as a symbol of Jesus. The holly represents his crown of thorns and the red berries the blood he shed.
        • In Poland, spiders are considered to be symbols of prosperity and goodness at Christmas. In fact, spiders and spider webs are often used as Christmas tree decorations. According to legend, a spider wove baby Jesus a blanket to keep him warm.
        • The tradition of hanging stockings comes from a Dutch legend. A poor man had three daughters for whom he could not afford to provide a dowry. St. Nicholas dropped a bag of gold down his chimney and gold coins fell out and into the stockings drying by the fireplace. The daughters now had dowries and could be married, avoiding a life on the streets.
        • Almost 28 sets of LEGO are sold every second during the Christmas season.
        Related image

        Craft/Science Project

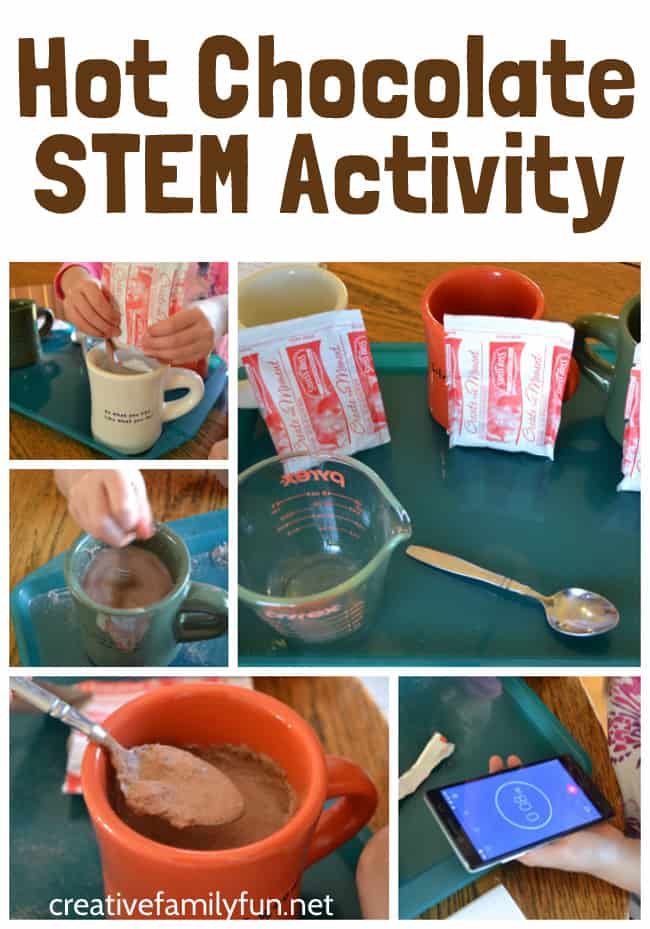
        This hot chocolate science experiment is a fun way to learn about how temperature affects the rate at which hot chocolate dissolves. It's a great STEM activity that uses items you probably already have in your kitchen.


        Supplies:
        Instructions:
        1.  Make a prediction: Which temperature of water would dissolve the hot chocolate the quickest?
        2. Empty your hot chocolate into your mugs, one packed per mug. Them move on to testing the different temperatures of water.
        3. Decide what kind of temperature you want your water to be. Some good examples would be ice cold, room temperature and hot water. If you want more specific temperatures, you can use a kitchen thermometer to measure the water's temperature.
        4. Measure 6 oz of water and pour into the mug, one mug at a time. Once the water is added to a mug, start your stopwatch and stir. Keep the stopwatch running until you see the hot chocolate has dissolved. 
        5. Take turns measuring the water, stirring and operating the stopwatch. Time how long it takes the hot chocolate to dissolve in each mug. 
        6. Write down your results in your notebook and hypothesize why each result happened as it did.
        7. Science tidbit READ ONCE EXPERIMENT IS DONE
          1. Hot water has more energy than cold water. With more energy, the molecules in the water move fast breaking down the hot chocolate mix quicker. 
        If you need more information/picture references, visit this link: https:/creativefamilyfun.net/hot-chocolate-science/

        Thursday, November 15, 2018

        Pumpkin, Leaves & Monopoly

        Bi-Weekly GIA Newsletter

        Student Feature: "Delicious Double Helix" 

        Rueben really enjoyed one of our science activities this week! He created an edible double helix. Nice work Rueben! 


        November Birthdays:
        • Elgin C.
        • Zaini R.
        • Hanner C.
        • Tyler R. 
        • Vanessa M.
        • Nicolas S.
        • Emma T.
        • Julian Y.
        • Sierra B.
        • David K.
        • Elmejoy A.
        • Vanessa S.
        • Jeffrey II A.
        • Denise K.
        • Tyler W.
        • Brandon W.
        • Megan G.
        • Bella E.
        • Zephaniah A.
        • Noah D.
        • Melquisedec MN.
        • Hannah G.
        • Jonathan B.
        • Gabriel L.
        • Jayden M.
        • Esther P.
        • Ezekiel B.
        • Thomas B.
        • Jomar F.
        • Tiffany RC.
        • Gabriel M.


         Storytime Announcements

        Baker's Corner!

        Pumpkin Spice Muffins
        pumpkin muffins on plate

        Batter Ingredients:
        • Spice Cake Mix
        • 1 can Pumpkin (I used canned pumpkin puree)
        • 3 eggs
        • 1/4 cup of water
        Streusel Topping Recipe
        • 1/2 cup of flour
        • 1/2 cup brown sugar
        • 1/4 cup butter
        Instructions:
        1. We will begin by preparing the muffin batter. Mix all your ingredients together in a large mixing bowl. You can use a whisk, hand blender or stand mixer.
        2. Place muffin tins in the muffin pan, or evenly coat each socket with spray oil. 
        3. Use a 1/4 measuring cup or ice cream scooper and fill the muffin tins until they are 3/4 of the way full. Be careful not to fill them up all the way or they will spill over.
        4. Prepare the streusel by mixing the flour and sugar together. Then cut in the butter.
        5. Place a couple of spoonfuls of streusel on each muffin.
        6. Bake at 350 for 15-18 minutes.
        If you aren’t into the streusel you can always enjoy the muffins plain or you might try a cream cheese frosting or maple glaze. It might also be fun to throw a few chocolate chips into the batter.

         Creating in the kitchen is so much fun! You can share your pictures of your apple crisp on griggs facebook page, or email them to me so that I can see your creation.


        A Little Pick-Me-Up


        What is the difference between praise and thankfulness? When we are thankful to God we are thanking Him for what he has done for us. He has given us food on our table, an education and friends and family. This is important to do! Praise gives credit to God for who he is! Look at the difference in this verse, "The trumpeters and musicians joined in unison to give praise and thanks to the LORD. Accompanied by trumpets, cymbals and other instruments, the singers raised their voices in praise to the LORD and sang: “He is good; his love endures forever.” This Thanksgiving let's give thanks to God for WHO he is and what he has done. 


        November Facts: 
        • National Sandwich Day is November 3rd
        • The Erie Canal was formally opened in New York on November 4, 1825.
        • Abraham Lincoln gave his Gettysburg Address on November 19, 1863.
        • The US and Canada celebrate the end of WWI every year on November 11, 1918.
        • Bruce Lee's, martial artist, and film star birthday is November 27, 1940.
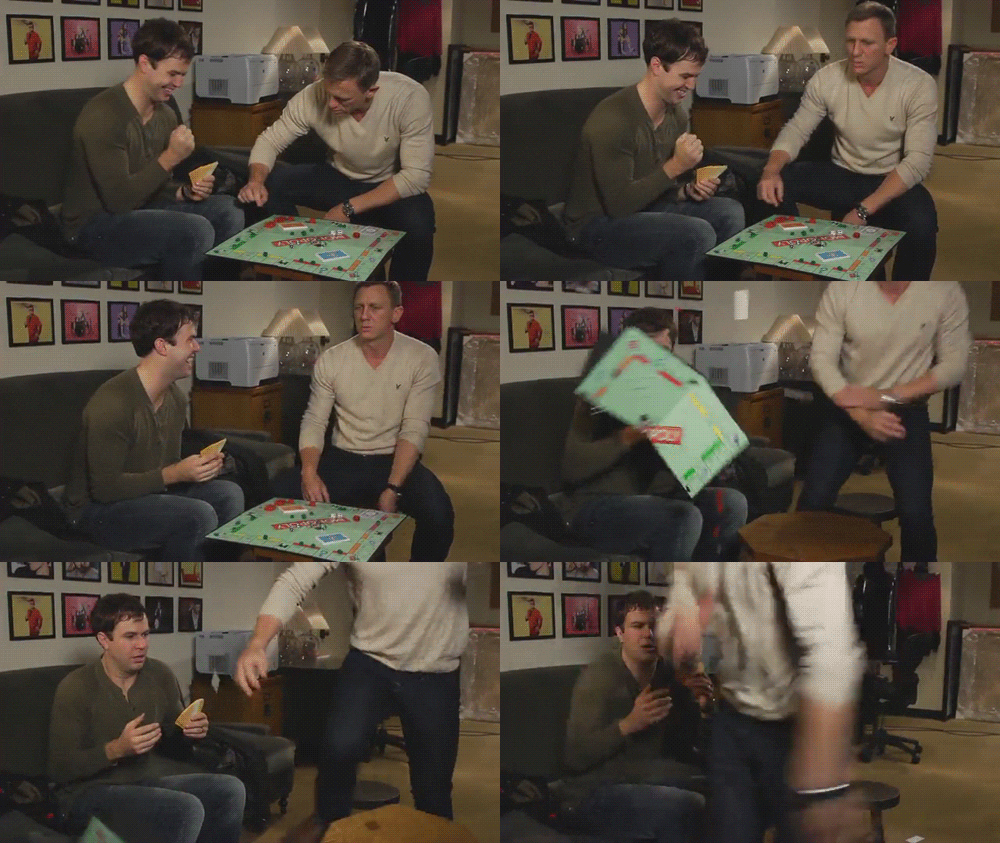
        • Parker Brothers introduced the world to the Monopoly game on November 5, 1935.
        Image result for gifs monopoly

        Craft/Science Project

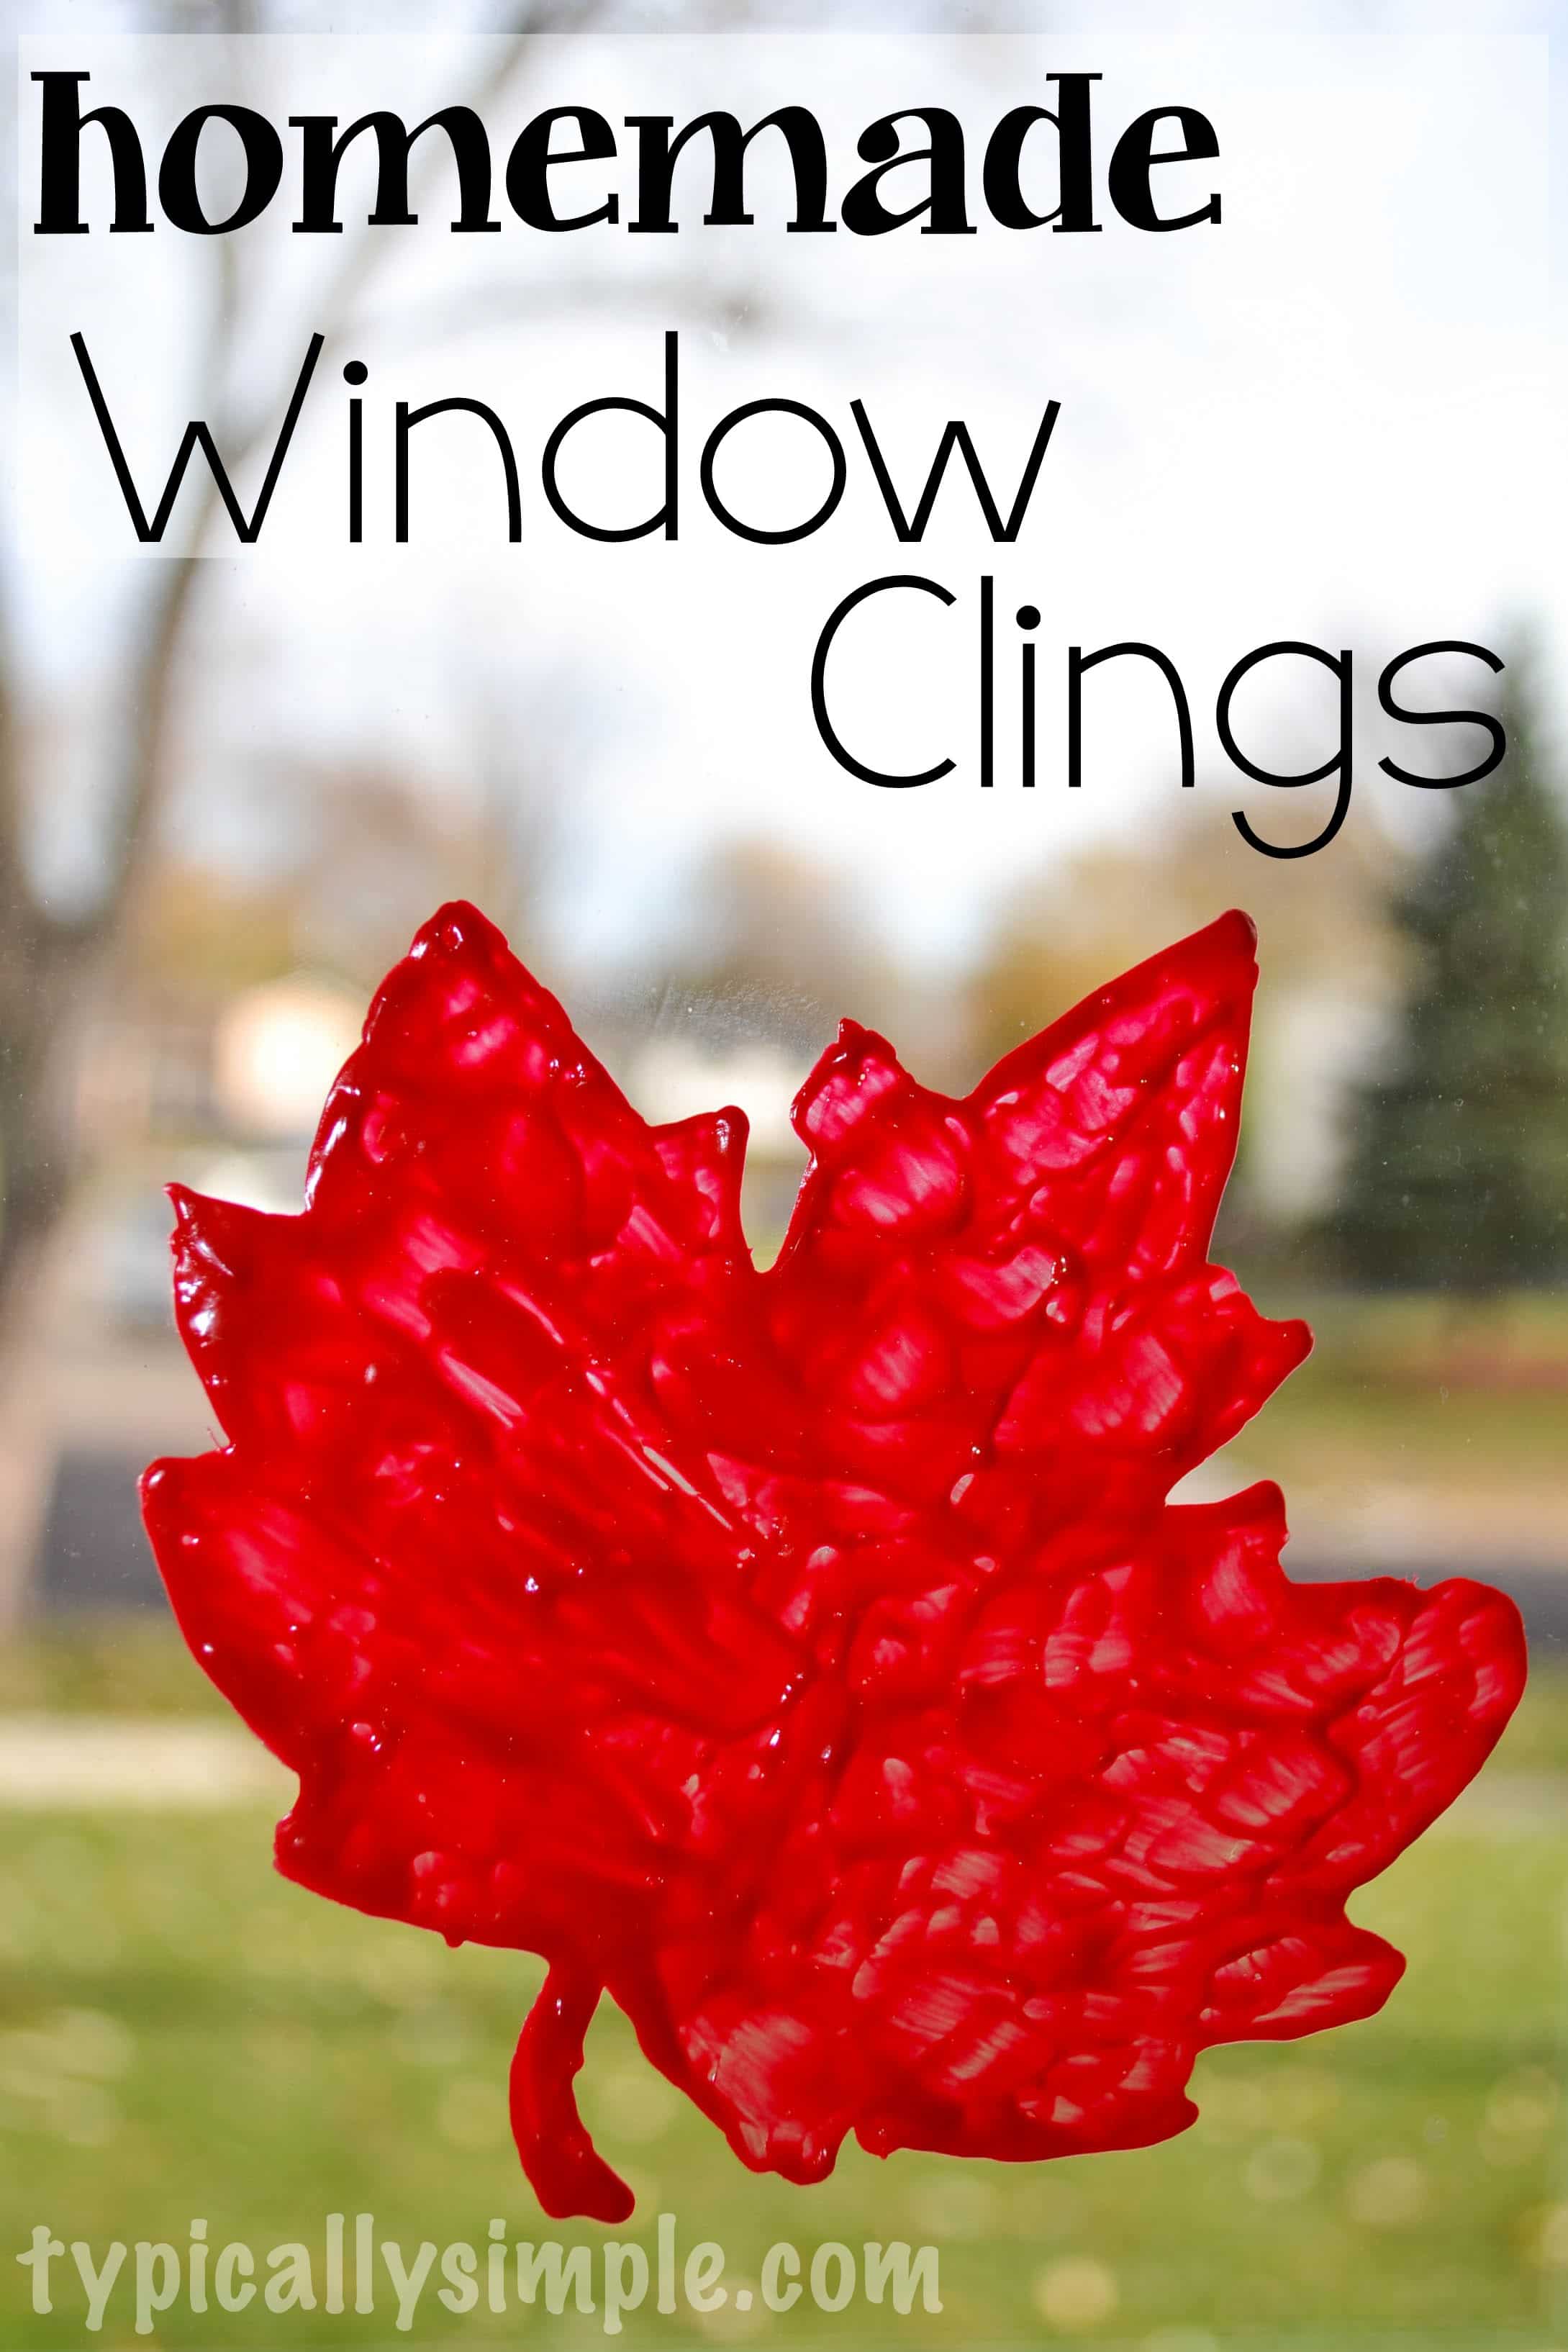
         Using puffy fabric paint and wax paper, create your own window clings - perfect for any season or holiday!


        Supplies:
        • Puffy Fabric Paint
        • Wax Paper
        • Printed Template
        Instructions:
        1. To make the template, I just found a leaf shape I liked, copy and pasted it a few times in a word doc, and printed it out. Lay a piece of wax paper over the template. If you don’t have wax paper, a plastic sandwich bag would also work!
        2. Using the puffy paint, I traced the outline of the leaf first then filled it in. I just used the tip of the puffy paint bottle to schmoosh the paint around, but I also found using a paint brush works pretty well if your little one has a hard time using the bottle to paint.
        3. Put the painted wax paper in a safe place to dry overnight.
        4. After the puffy paint has dried, the shapes can be pulled off the wax paper. I recommend this be done by an adult or older child. Depending on how large the shape is, it might need to be pulled off in sections or the paint starts to stretch out a little.
        5. And now the leaves are ready to be stuck to the windows! These are so simple to make and would be great for any season or holiday.
        If you need more information/picture references, visit this link: https://typicallysimple.com/diy-window-clings/

        Wednesday, October 24, 2018

        Fall is in the Air...

        {Issue #)

        Bi-Weekly GIA Newsletter

        Student Feature: Coming Soon...

        Look here soon for your chance to be featured
        in GIA's blog!

        October Birthdays:
        • Eustace P. 
        • Esosa O. 
        • Andrea S. 
        • Issac B. 
        • Chrishella K.
        • Michael M. 
        • Elliott F. 
        • K'Khtah A. 
        • Elizabeth H. 
        • Priscilla G. 
        • Tiffany M.
        • Haley C. 
        • Caleb J. 
        • Chulese B. 
        • Micah P.
        • Sarah B. 
        • Daniel W. 
        • Domenic H. 
        • Mickaylee S. 


         Storytime Announcements

        Baker's Corner!

        Easy Apple Pie Bites

        * 1/4 cup packed light brown sugar
        • * 1 teaspoon apple pie spice, and additional apple pie spice (about 1/4 teaspoon) for sprinkling on top of crescent rolls

        • * 3 tablespoons butter, melted

        • * 1/3 cup chopped pecans

        • * 1 small Granny Smith apple, cored and sliced into 8 (1/2-inch) slices

        • * 1 (8-ounce) can Pillsbury Original crescent rolls

        1. Preheat your oven to 375 degrees F. Line a baking sheet with parchment paper.
        2. In a small bowl, combine brown sugar and apple pie spice. Set aside.
        3. Melt butter and toss apple slices in butter, set aside.
        4. Arrange crescent roll triangles on a baking sheet lined with parchment paper. Evenly distribute brown sugar mixture onto each triangle.
        5. Sprinkle each triangle evenly with the chopped pecans. Place an apple slice on the wide end of each triangle. Wrap crescent roll dough around each apple.
        6. Brush each crescent roll with remaining butter. Sprinkle lightly with additional apple pie spice.
        7. Bake for 10-12 minutes, or until golden brown. Cool for 5 minutes before serving.
         Creating in the kitchen is so much fun! You can share your pictures of your apple crisp on griggs facebook page, or email them to me so that I can see your creation.

        A Little Pick-Me-Up

        "So all of us who have had that veil removed can see and reflect the glory of the Lord. And the Lord—who is the Spirit—makes us more and more like him as we are changed into his glorious image." (2 Corinthians 3:18) This verse is a reminder that what we behold, we become. When you behold something, it means you're looking at it for a long time. You're spending a lot of time with it! The things you spend your time doing or the people you spend your time with will eventually make up part of who you are. Take some time to think about how much time you're spending doing things in your life and if that is equally balanced with the time you're spending with Jesus. The more time you spend with Him, the more you will become like Him!


        Fun Fact: When leaves change color in the fall, they are actually becoming their true color. In the summer, the chlorophyll (which is how the leaves receive nourishment from the sun) takes over and causes them to turn green and hide their color.

        Craft/Science Project

        Apple Stamping 

        Supplies:


      • brown construction paper
      • white construction paper
      • white glue or glue stick
      • scissors
      • green paint
      • red paint
      • 2 foam brushes
      • 2 paper plates
      • 2 apples, cut in half
      • apple seeds, reserved from cut apples
      • markers (optional)

      • Directions: 
        1. Use scissors to cut a piece of construction paper in half.

        2. Cut a one-half sheet of paper into long strips. Cut a one-half sheet of paper into short strips. Lay one long strip on a flat surface and place the short strips in the opposite direction, overlapping and gluing the pieces together.

        3. Use long strips to weave the basket and glue the ends.

        4. Finish the basket with one long piece of paper, on the top and secure with glue. Trim the sides of the basket and round the corners on the bottom of the basket.

        5. Place paint on paper plates. Use foam brushes to apply paint to sliced apples and stamp them onto white construction paper. Let dry.

        6. When dry, use glue to add the basket to the paper and the seeds to the apple.

        *If you need picture references, please visit the link posted for the original craft: o   https://premeditatedleftovers.com/naturally-frugal-mom/apple-stamping-craft/#_a5y_p=5594193